Cable Extension Kit | THSER101
Guide to Set Up THSER101 with NVIDIA Jetson Nano
Introduction
This page will guide you to quickly and successfully use the THSER101 Cable Extension Kit for Raspberry Pi to stream a Raspberry Pi camera on your NVIDIA Jetson Nano Developer Kit that is placed meters away from the Jetson Kit!
One of the reasons why Raspberry Pi Cameras are so popular is because there are multiple platforms other than the Raspberry Pi computer that support the cameras.
Our THSER101 Cable Extension Kit for Raspberry Pi Camera is designed to work perfectly with Raspberry Pi Cameras and as a result, it also works well with any computer that can drive Raspberry Pi cameras, including the Raspberry Pi V2 and HQ Cameras.
Hardware Overview
NVIDIA Jetson Nano Developer Kit
~10” (30cm) ribbon cable recommended
Any NVIDIA Jetson Nano Developer Kit should work. We recommend using the 5V 4A barrel jack power supply instead of the Micro-USB. We have tested and confirmed the following brands:
For MIPI CSI-2 transmission from THSER101 Rx Board to Jetson Nano Developer Kit, we recommend to use approximately a 10” (30cm) ribbon cable because the cable included to THSER101 is too short for Jetson Nano. Please note we do NOT recommend a length more than 10” (30cm) for MIPI CSI-2 cabling because the signal integrity may get too worse.
Raspberry Pi Camera
All Raspberry Pi Cameras that work with the THSER101 will work. (i.e., V2 Camera, HQ Camera)
Raspberry Pi V2 Cameras
Raspberry Pi HQ Camera
THine Solutions Cable Extension Kit THSER101
The THSER101 is available at Digi-Key. A 2-meter Ethernet cable is included along with mounting screws/nuts in the THSER101 Kit.
Multi-meter Ethernet Cable
While the THSER101 includes a 2-meter Ethernet cable, you could use longer cables to increase the length for your application. We have found good results with cable lengths up to 15 meters.
Hardware Setup
NVIDIA Jetson Nano + Raspberry Pi Camera
Before installing THSER101 to the system, it is recommended to make sure that your NVIDIA Jetson Nano works with Raspberry Pi Camera without the THSER101.
There are many Jetson users who have successfully set up a Raspberry Pi camera. Also, websites explaining how to do this are readily available. JetsonHacks is one such site that we highly recommend.
Connect Raspberry Pi Camera to THSER101 Tx Board
Once you confirm your NVDIA Jetson and Pi Camera work together, let’s install THSER101.
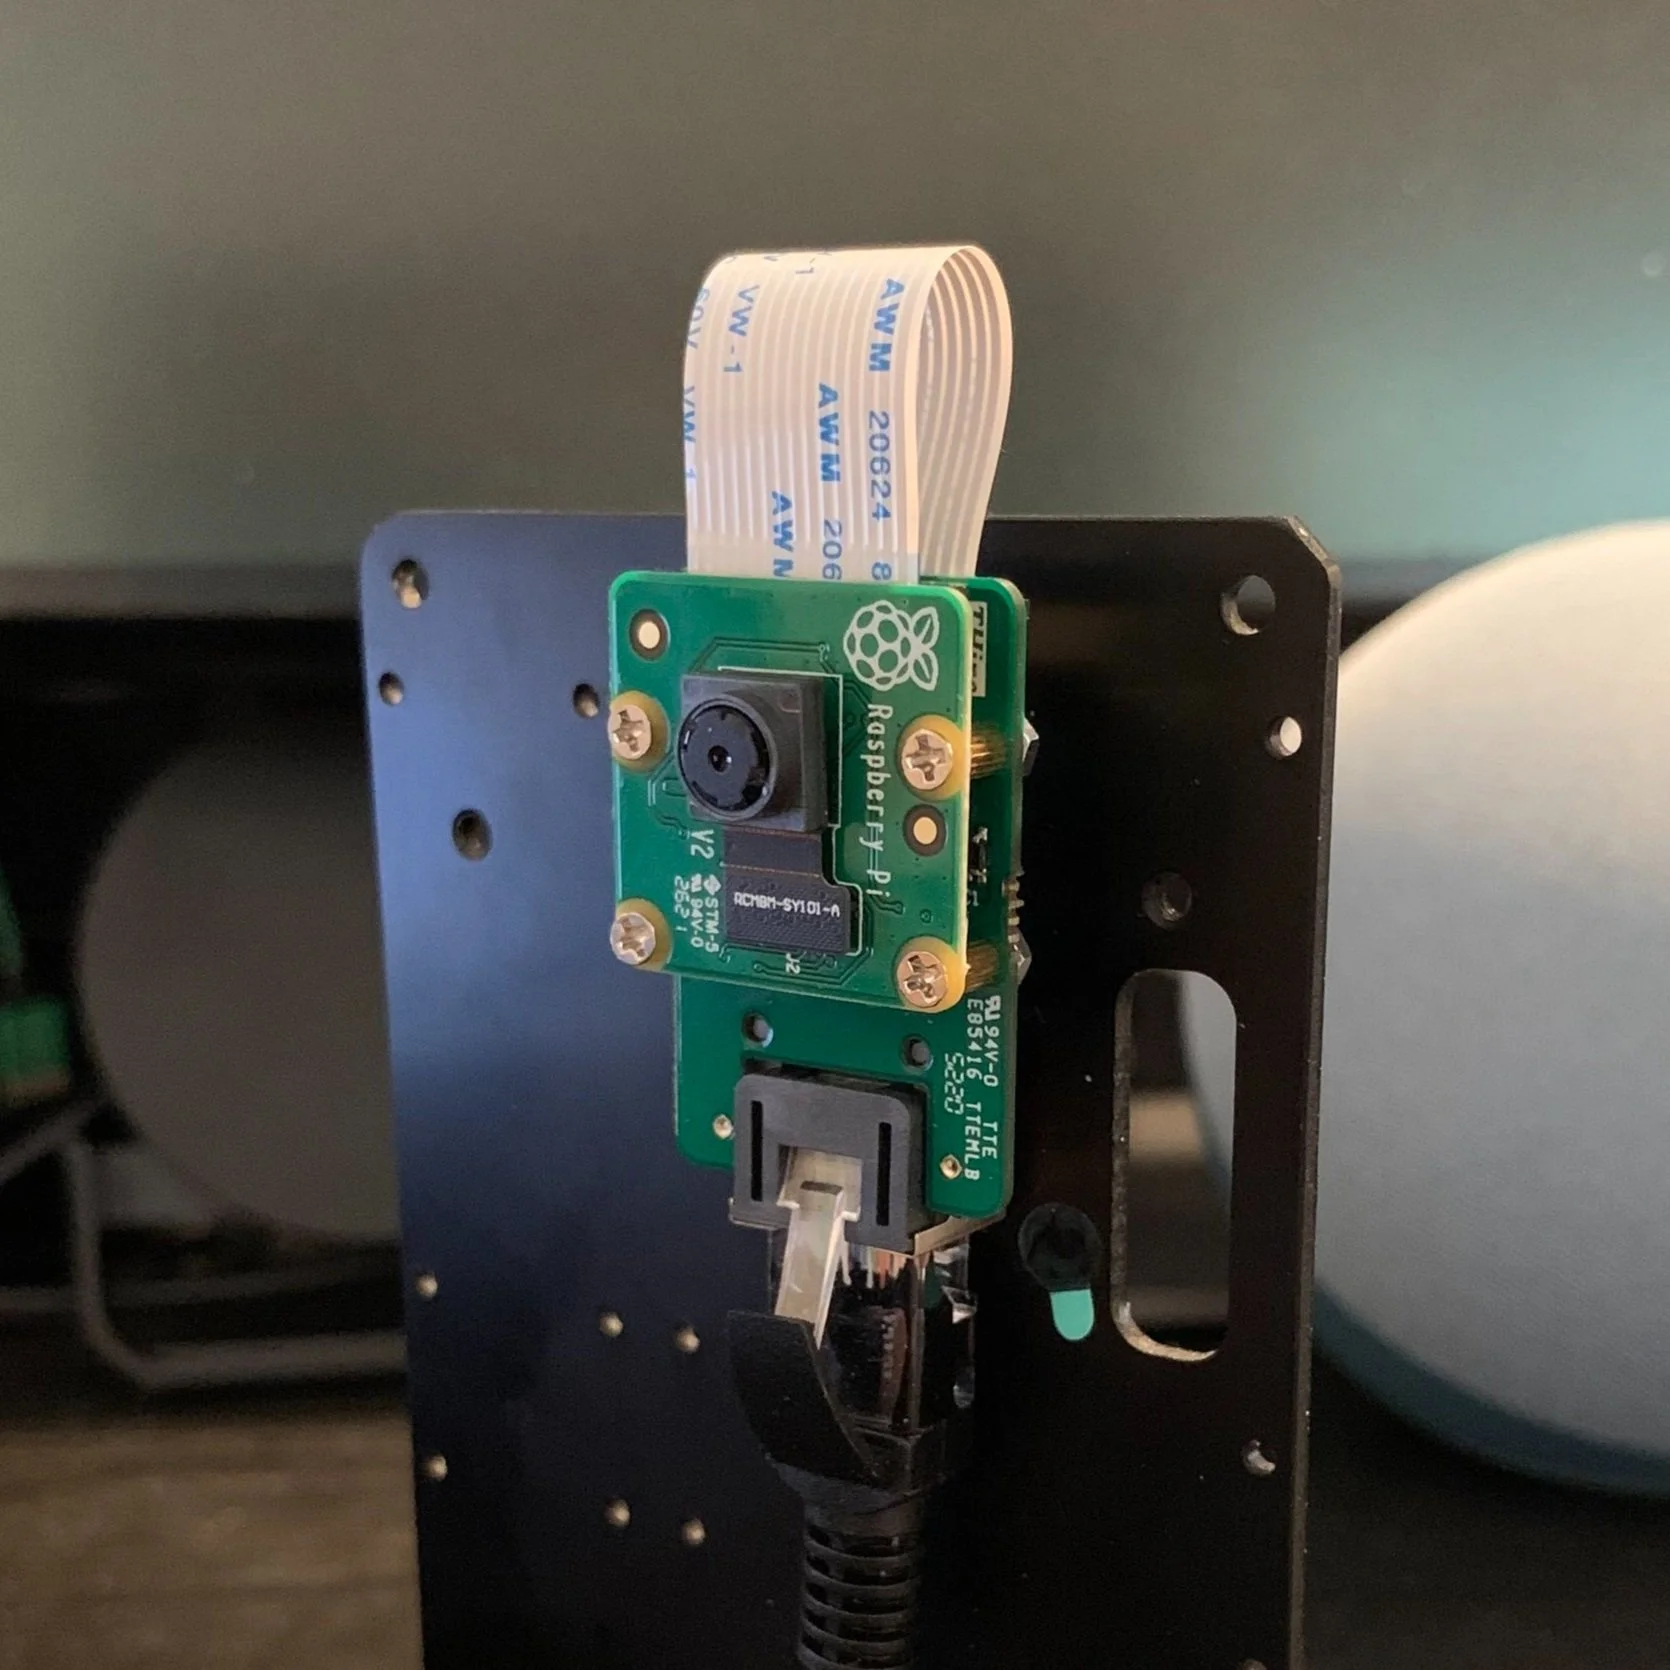
Raspberry Pi V2 Camera Connected to THSER101 Tx Board
As the Pi Camera and the THSER101 Tx Board share the 4 screw holes, you can easily assemble them in a small form factor. (THSER101 includes those screws and nuts!)
Connect THSER101 Rx Board to Jetson Nano Developer Kit
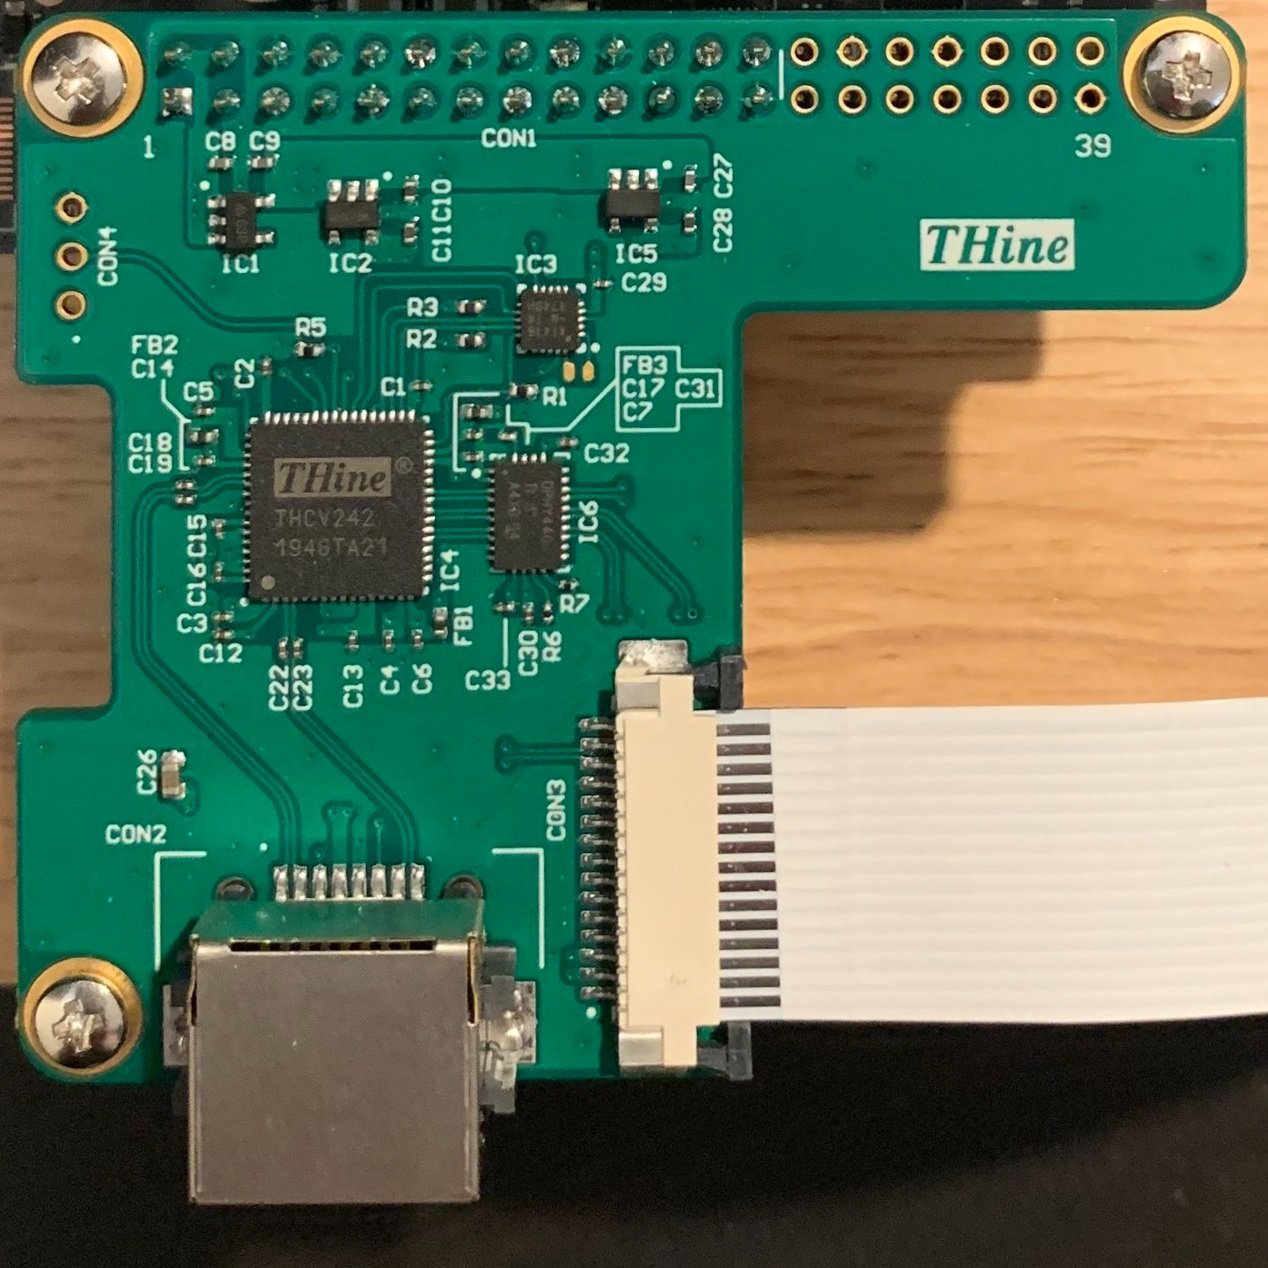
Connect THSER101 Rx Board and Jetson Nano with a Ribbon Cable for MIPI CSI-2.
You might be surprised that most Single Board Computers share the pin assignment of their GPIO connectors. THSER101 Rx Board takes power from the Jetson Nano Developer Kit without needing any tweak, feeding THSER101 Tx Board and Raspberry Pi Camera meters away with enough power.
The ribbon cable’s pins upper side
THSER101 Rx Board and Jetson Nano connected with GPIO connector | Mounting screws (included to THSER101) are optional
Stream Video
Actually, there is no additional software setup needed. If all physical connections are established properly, your Jetson Nano should be able to get the camera images as if the camera is connected directly to the computer. Your Jetson Nano will acts like THSER101 does not exist!
Thus, the process introduced here is exactly same as JetsonHacks guides you to. If you are using a different way to stream camera, it should work with using the THSER101.
Install and Run the Driver
The CSI-Camera repository JetsonHacks provides contains everything to test the camera.
Running code that JetsonHacks provides
After unzipping on Desktop,
cd Desktop
cd CSI-Camera-master
To stream, command:
$ gst-launch-1.0 nvarguscamerasrc ! nvoverlaysink
To exit, Ctrl-C
Raspberry Pi Camera video is streaming on Jetson Nano platform through THSER101 Cable Extension Kit
What’s Next - Want a Higher Performance Camera?
Using the Raspberry Pi Camera, you might notice that the color configuration is not exactly what your application requires and/or that the image is too out-focused for Jetson Nano to perform the graphical processing or artificial processing.
The typical cause of these issues are because Raspberry Pi Camera does not have Auto Focus functionalities or image processing configurations. This ‘gap’ sometimes requires tremendous engineering effort to overcome if you need better Image Quality or Auto-Focus.
Image Quality of Raspberry Pi Camera on Jetson Nano | It is very hard to read the letters on the brochure due to out-focus, noise, etc.
For a better camera experience, see great camera kits that we offer below:
Evaluate THEIA-CAM (THSCU101)
Image Quality of THEIA-CAM (THSCU101) on Jetson Nano | Not only significant readability of every letter in the view, colors of the brochure are well reproduced.
THSCU101, 13MP PDAF UVC Camera, is a reference camera kit that runs not only on Windows, but Linux such as Jetson Nano. You can hook up this camera with your Jetson Nano to evaluate its tuned color, ultra fast auto-focus, as well as the 13MP high resolution.
We are confident and proud of the Image Quality of the THEIA-CAM THSCU101. With Imatest criteria, the THSCU101 does perform better than iPhone 12 in most areas.
The THSCU101 is available for purchase at Digi-Key.
Reference THEIA-CAM for Linux (THSCM101)
If the THSCU101’s performance is good enough but its USB3.0 interface is not applicable for your application, you can take another kit THSCM101 into consideration.
The THSCM101, Linux Camera for NXP i.MX 8M Family, has MIPI CSI-2 output with the same camera performance as THSCU101.
The THSCM101 is alavailable for purchase at Digi-Key.
Develop Your Own ISP Firmware (CDK)
If you want to further configure the ISP Firmware of the THEIA-CAM and/or add more functionalities to it, we offer GUI-based tools called Camera Development Kit which allows you to develop ISP Firmware from scratch not only for the Image Sensor Module of THEIA-CAM (including Sony IMX258) but also any CMOS Sensor that compliant with our ISP (THP7312).
For further information, hit “Request for Technical Support” and tell us your project.
Related Pages
Product Overview | THSER101 Cable Extension Kit for Raspberry Pi Camera | THine Solutions, Inc.
Product Overview | THSCU101 13MP PDAF UVC Camera | THine Solutions, Inc.
Image Quality Report | THSCU101 Image Quality Report | THine Solutions, Inc.
Blog | Upgrade to PDAF for Best Auto-Focus Experience! | Tak Iizuka | THine Solutions, Inc.
Review | THine Cable Extension Kit | Lucy Hattersley | The MagPi magazine issue #106
Review | Dev Kit Weekly: THine THSER101 Raspberry Pi Camera Module Cable Extension Kit | Embedded Computing Design


