THEIA-CAM™ Family Kit | THSCP101 | 13MP PDAF Camera for Pumpkin
Start Guide
Items You Need
THSCP101 THEIA-CAM™
The THSCP101 includes:
Camera Board
Adapter Card for Pumpkin
Flat Flexible Cable (FFC)
THSCP101 (Top to Bottom: Camera Board in Acrylic Case, FFC, and Adapter Card)
Windows 10 Computer (PC)
You need to be able to decompress a .tar.gz file with software including:
WinRAR | Download Page
You need one of following Terminal Emulators installed.
PuTTY | Download Page
TeraTerm | Download Page
Unless you have, install VCP Driver.
FTDI Chip | VCP Driver | Download Page
USB Type-C Cables (3pcs)
The Cables are for following purposes.
Power Supply for Pumpkin | 1 Cable
5V/3A with USB 3.0 Type-C cable to supply power to the Pumpkin
Communication between PC and Pumpkin | 2 Cables
The Pumpkin has 2 Type-C connectors for this purpose. Confirm the USB ports for your Windows 10 Computer and prepare the required cables. (E.g., If the Windows Computer has 2 Type-A ports, 2pcs of Type-A to Type-C cables are needed.)
Display and Micro-HDMI Cable
The Pumpkin Computer supports Micro-HDMI connector.
Linux Binary of Pumpkin for THSCP101
The file is available upon request. Please check the “THSCP101 Linux Binary for Pumpkin” check box, fill out your project information including Pumpkin Model (i350 or i500), and submit your request. We will respond as soon as possible.
Step 1 PC Setup with MediaTek AIoT Tools
The flash programming process will be performed over a USB connection between the Pumpkin and the PC containing the image.
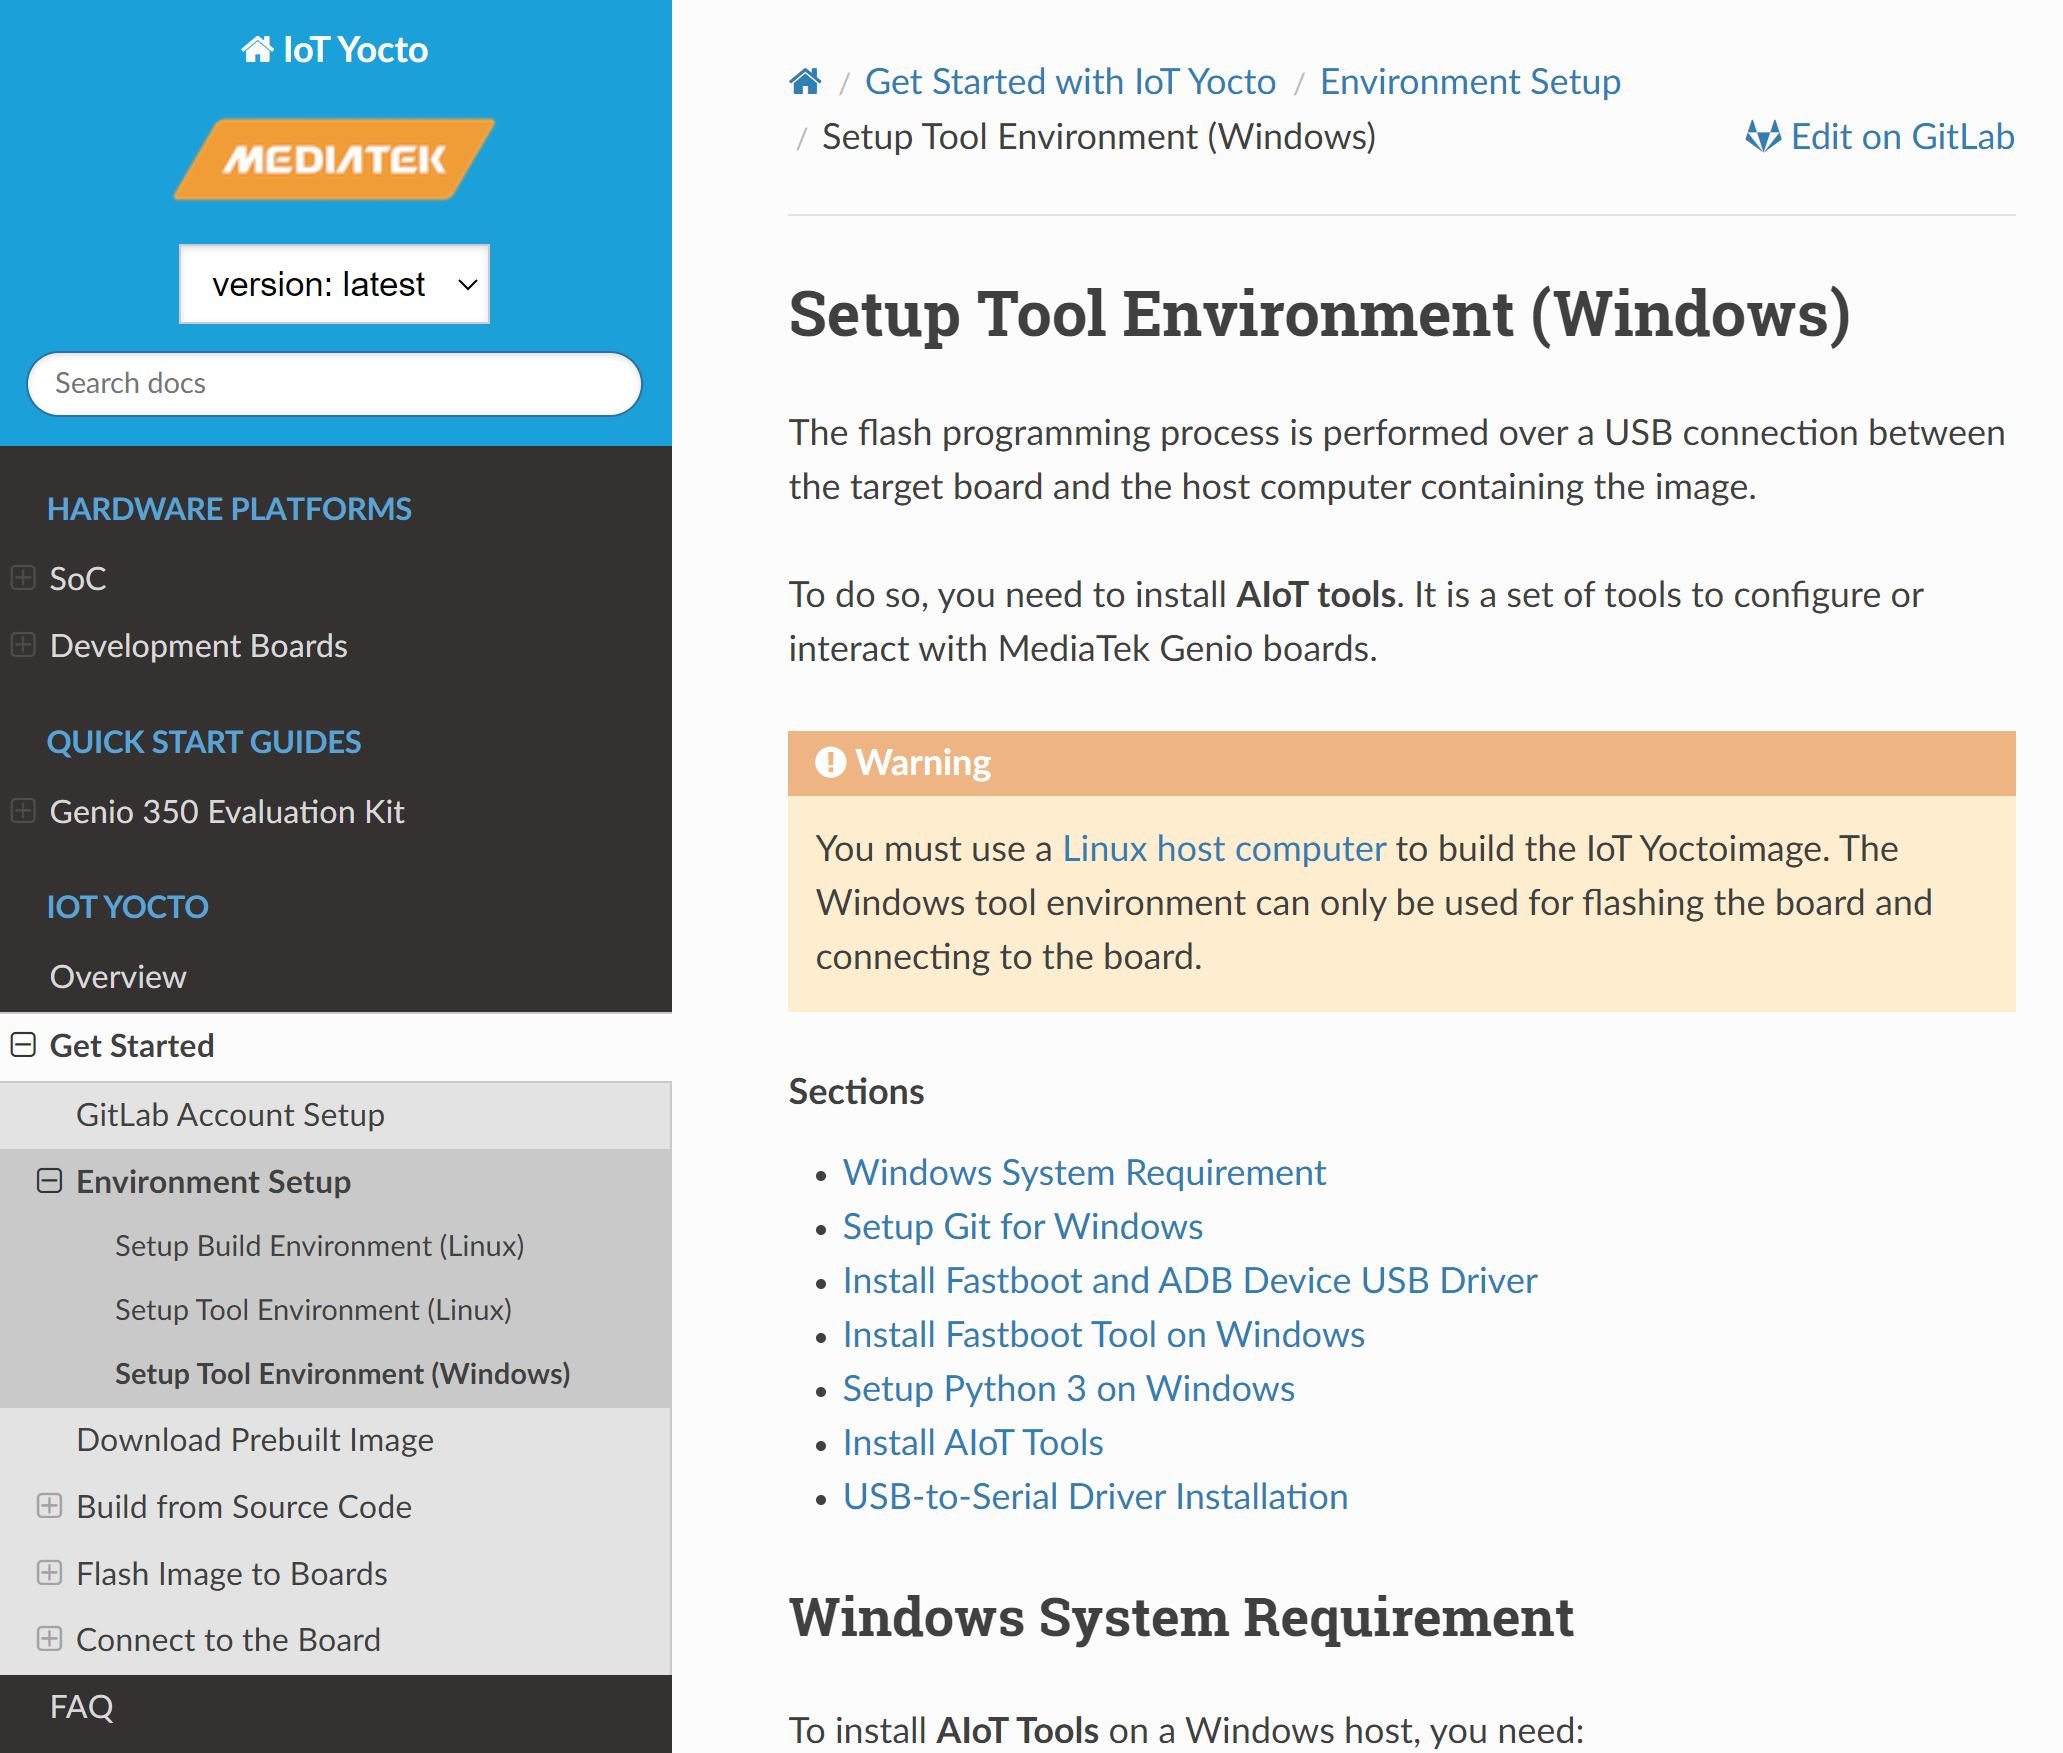
To do so, you need to install MediaTek’s AIoT tools. It is a set of tools to configure or interact with Pumpkin powered by MediaTek Genio SoC.
Access MediaTek’s GitLab page and follow the instructions in the “Get Started” Section.
Note: If you have already gone through this process, skip to the Step 2.
Step 2 Get Linux Binary for THSCP101 Ready in PC
Step 2-1 Store the Binary
The Binary file is available upon request through Technical Support Request form.
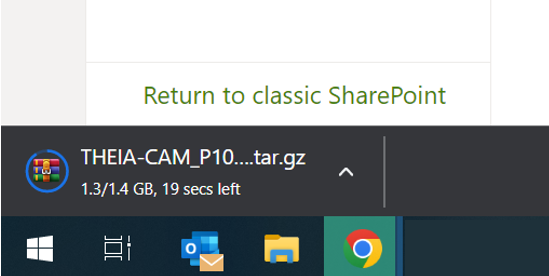
The file is provided in .tar.gz format. (File Title: THEIA-CAM_P101_i350.tar.gz)
Store the folder in the PC.
Step 2-2 Decompress the Binary
Decompress the file as the Administrator mode.
Step 3 Hardware Setup
Step 3-1 Connect THSCP101’s FFC and Adapter Card to Pumpkin
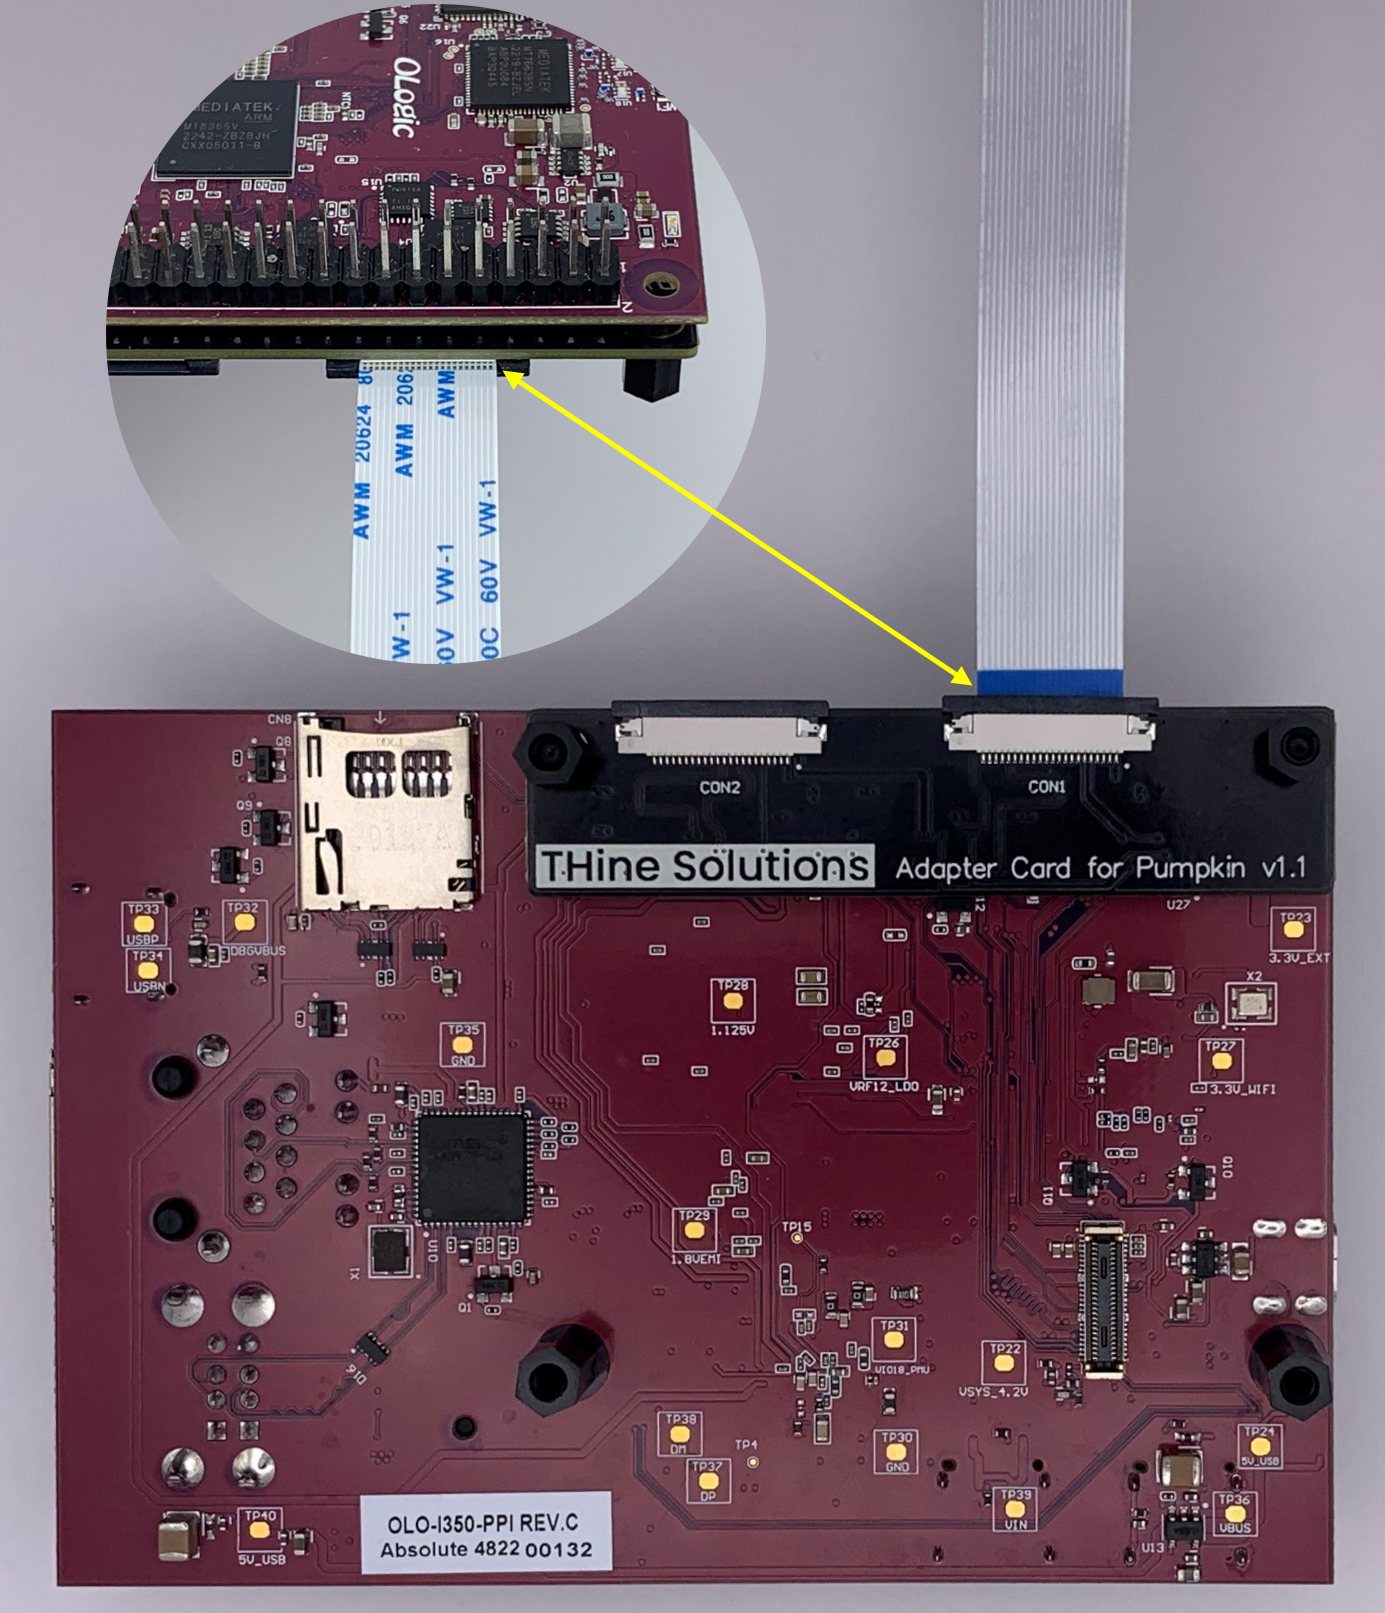
The Adapter Card has 2 connectors that match with 2 MIPI Connectors on the backside of the Pumpkin. Make sure it clicks when connected.
For stable connection, you might want to use 2pcs of M2.5 x 2.8mm spacers between the 2 boards.
For primary camera, use the connector that says CON1 as shown in the picture. The FFC has pins on one side that needs to face the Adapter Card. Refer to the picture.
Step 3-2 Connect THSCP101’s Camera Board and FFC
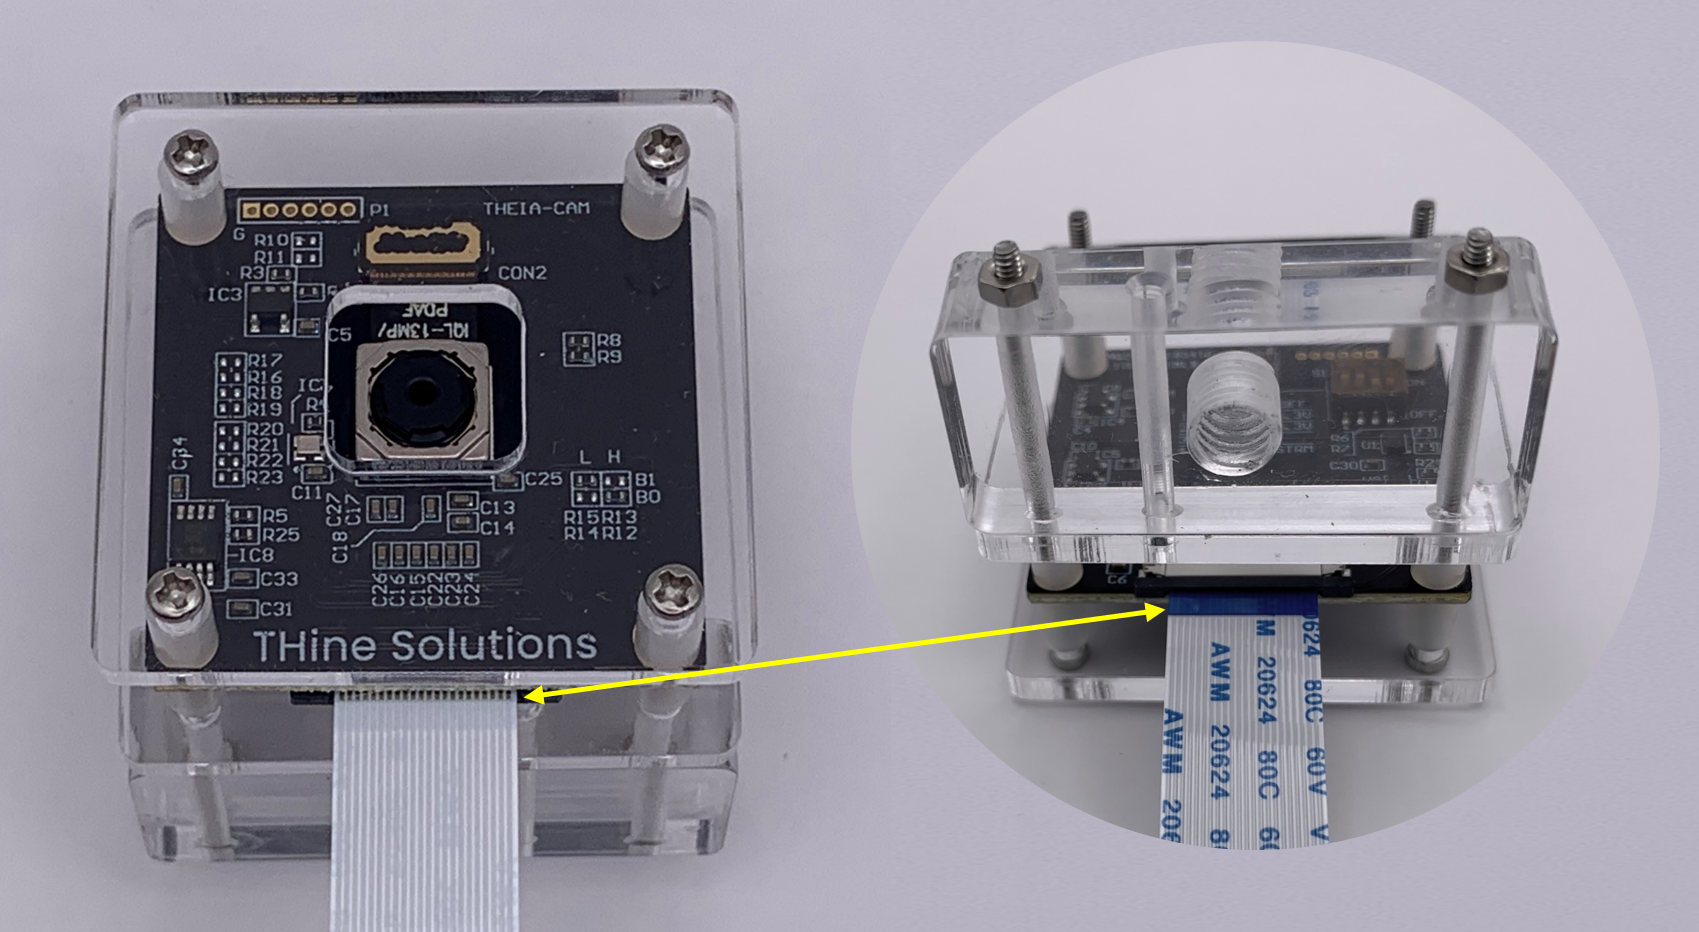
Connect the FFC to Camera Board.
The FFC has pins on one side that needs to face the Camera Board. Refer to the picture.
Step 3-3 Connect PC and Pumpkin’s DEBUG port with USB Cable
The PC is OK to be powered on, but it is highly recommended to connect in the order desribed in this section.
The DEBUG port is Type-C connector.
Step 3-4 Connect Display and Pumpkin with Micro-HDMI Cable
The port for Display is Micro-HDMI connector.
Step 3-5 Connect PC and Pumpkin’s DATA port with USB Cable
The DATA port is Type-C connector.
Step 3-6 Connect Power Source and Pumpkin’s POWER port with USB Cable
The POWER port is Type-C connector requiring 5V/3A for stable operation.
By supplying power to the POWER port, the Pumpkin powers on.
Step 4 Program Linux Binary to Pumpkin
Step 4-1 Locate Working Folder
Launch Windows Command Prompt.
Change the working folder to the folder where the Linux Binary for THSCP101 is located.
Step 4-2 Command Program
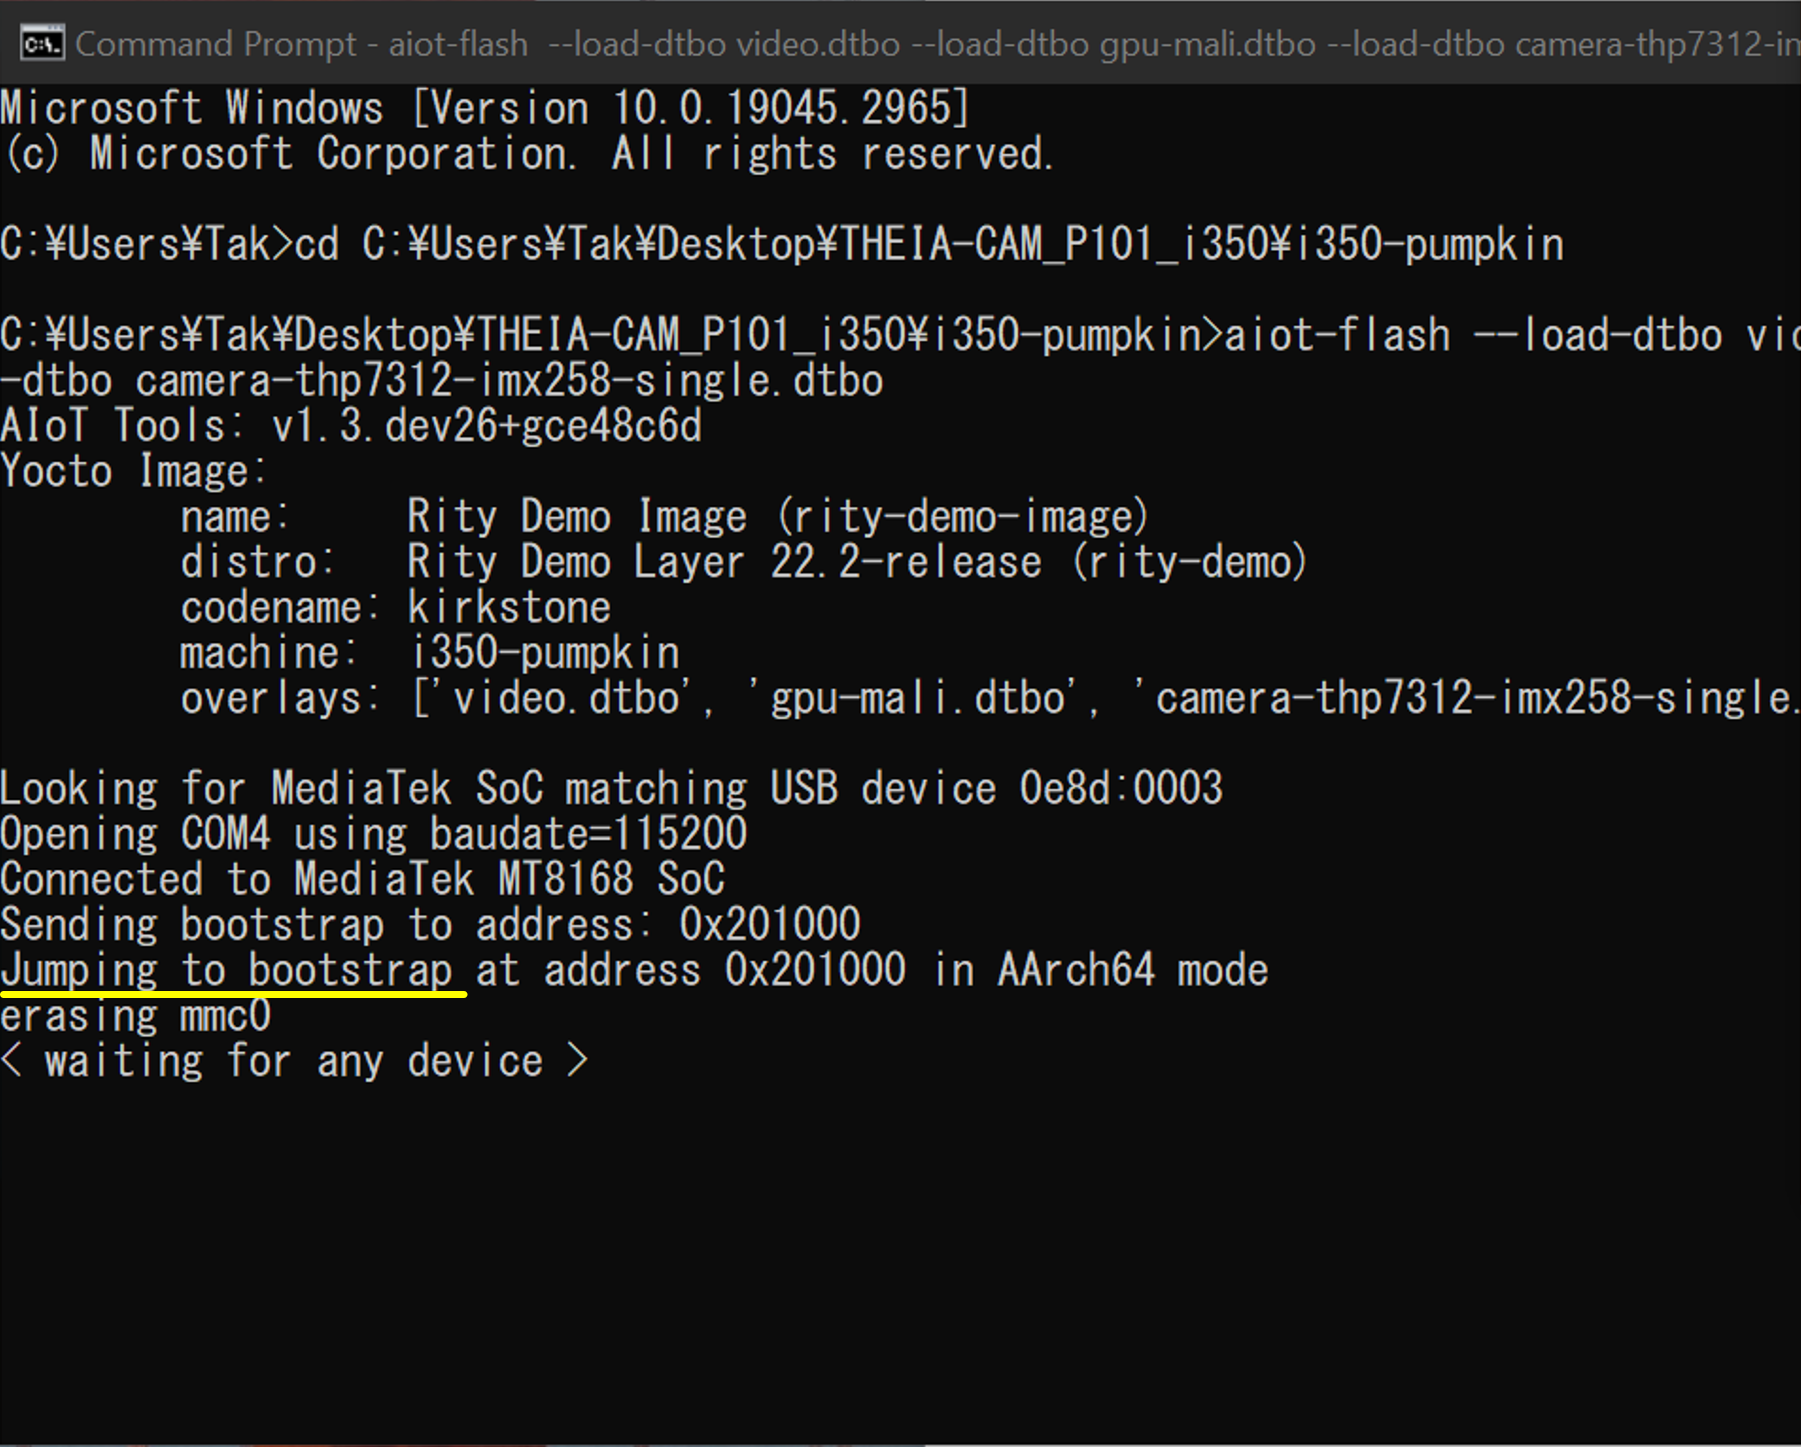
Enter the following command to program the Linux Binary to Pumpkin.
aiot-flash --load-dtbo video.dtbo --load-dtbo gpu-mali.dtbo --load-dtbo camera-thp7312-imx258-single.dtbo
Wait until “Looking for MediaTek SoC matching USB device 0e8d:0003” to be shown in the Prompt.
Step 4-3 Reset Pumpkin
Press Pumpkin’s DOWN and RST buttons. Then release the RST button.
Wait until the Command Prompt is ready for input.
Note: If you see “aiot-frash” keep waiting after “jumping to bootstrap” in the Command Prompt, This is likely caused by an unrecognized device driver. Follow the instructions in the following link and update Android Bootloader Interface Driver.
Missing “Yocto” Device Driver | MediaTek IoT Yocto Developer Guide
If you see this window, move on to the next step.
Step 4-4 Remove DATA USB Cable
The USB Cable at DATA port is no longer needed.
Step 5 Login Linux on Pumpkin
Step 5-1 Reboot Pumpkin
To reboot the Pumpkin, press PWR for 1 second or unplug and re-plug the USB Cable at the POWER port.
Step 5-2 Setup in PuTTY or TeraTerm
You may need to install VCP Driver for this step.
If you are using PuTTY, follow the steps below.
In PuTTY, select Session in the Category, and fill out the settings referencing the following picture, and hit Open.
The COM port number can be confirmed under “Ports (COM & LPT)” in Windows Device Manager. There should be “USB Serial Port (COM11)” for example.
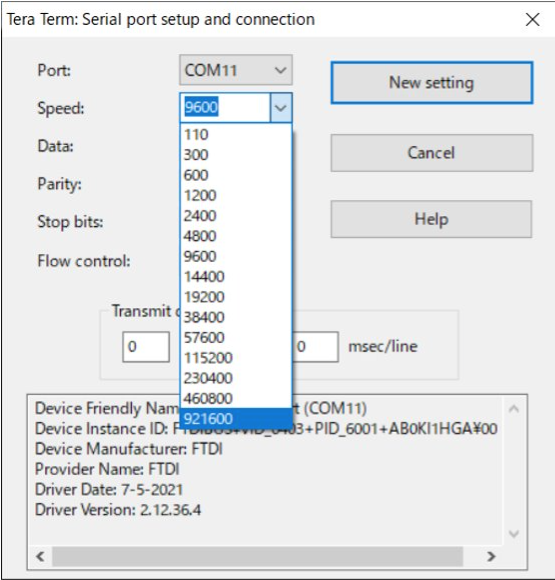
The Speed needs to be 921600.
By pressing Enter Key, the PuTTY displays the following message.
Enter “root” and press Enter Key to login as Root.
If you are using TeraTerm, follow the steps below.
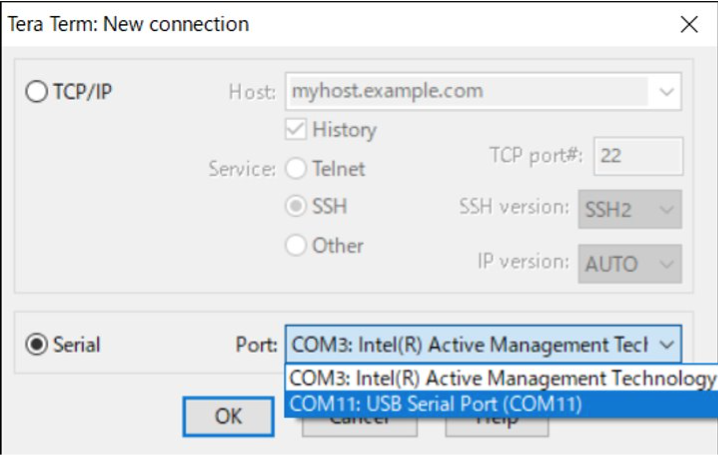
In TeraTerm, select the serial option.
Open Port Setup window by Setup > Serial Port…. Then select the Speed as 921600, and click “New Setting.”
By pressing Enter Key, the TeraTerm displays the following message.
Enter “root” and press Enter Key to login as Root.
Step 6 Stream Video
Enter the following command, to stream 4K at 30fps for example.
media-ctl -d /dev/media0 -r
media-ctl -d /dev/media0 -l "'thp7312 3-0061':0" -> "'15040000.seninf':1 [1]'"
media-ctl -d /dev/media0 -V "'thp7312 3-0061':0 [fmt:YUYV8_1X16/4160x3120@1/20 field:none]"
media-ctl -d /dev/media0 -V "'15040000.seninf':4 [fmt:YUYV8_1X16/4160x3120 field:none]"
gst-launch-1.0 v4l2src device=/dev/video0 ! video/x-raw,format=YUY2,width=4160,height=3120,framerate=20/1 ! queue max-size-time=0 ! waylandsink sync=false fullscreen=true
To stop streaming, Ctrl + C.
To shutdown,
poweroff
-
The MediaTek V4L2 driver consists of multiple sub-device drivers. We need to configure the sub-device drivers before streaming images. This is called the pipeline configuration of the V4L2 driver, defined by Linux.
The following commands configure the connection of sub-device drivers and image format as the pipeline configuration of the V4L2 driver.
-
Reset the V4L2 pipeline configuration.
-
Connect "thp7312" sub-device driver to the "seninf" (sensor interface) sub-device driver.
-
Configure the image format, image size, and frame rate of "thp7312" sub-device driver.
The image format is "YUYV8_1X16", YUY2. The image size and frame rate combination is "4160x3120@1/20" i.e., 4160x3120@20fps.
-
Configure the image format, image size and frame rate of "senif" (sensor interface) sub-device driver.
The image format is "YUYV8_1X16", YUY2. The image size and frame rate combination is "4160x3120@1/20", i.e., 4160x3120@20fps.
-
Request gstreamer which is one of the Linux applications to output the YUY2, 4160x3120@30fps streaming images of "/dev/video0" to the "waylandsink". "waylandsink" is a monitor.
THSCP101 Resources
Start Guide (This Page) | Start Guide PDF Version
Following items are available upon request via the Request Form:
For Advanced Use
How to boot THSCP101 and Pumpkin EVK without USB (Coming Soon)
How to use Dual THSCP101 with Pumpkin (Coming Soon)
Related Pages
Image Quality Report | THSCU101 Image Quality Report | THine Solutions, Inc.
THP7312-P Press Release | THine Introduces a Standalone ISP and Firmware Development Tools to Stream Uncompressed 4K 30fps Video | THine Solutions, Inc.
Whitepaper | Design Trend for Embedded Vision Systems that Include High Performance Cameras | Katsumi Kuwayama | THine Solutions, Inc.
Blog | Upgrade to PDAF for Best Auto-Focus Experience! | Tak Iizuka | THine Solutions, Inc.


